Rialta owners are always looking for ways to increase cabinet storage space.
Some opt to modify the existing cabinets to increase shelf space while others opt
to add cabinets where there previously had been none.
 This
modification was performed on a 2000 HD in which the original storage cabinet
under the kitchen sink seemed to waste a lot of space. It extends the rear wall
of cabinet back several inches, adds a second shelf, and affords the opportunity
for a "secret storage hide-away" under the floor of the cabinet.
This
modification was performed on a 2000 HD in which the original storage cabinet
under the kitchen sink seemed to waste a lot of space. It extends the rear wall
of cabinet back several inches, adds a second shelf, and affords the opportunity
for a "secret storage hide-away" under the floor of the cabinet.
As you look at the front of the un-modified cabinets, you will
see the two base areas next to the carpet that are not movable. The large one
under the oven (or storage drawers if not equipped with the oven) actually holds
the gray water tank.
 However,
the smaller one under the sink cabinet floor and just to the right of the gray
water tank and adjacent to the coach battery box holds nothing at all and is just
a big waste of space.
However,
the smaller one under the sink cabinet floor and just to the right of the gray
water tank and adjacent to the coach battery box holds nothing at all and is just
a big waste of space.
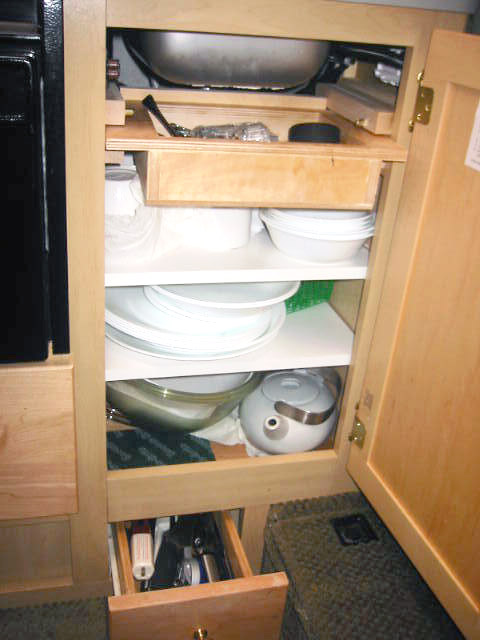
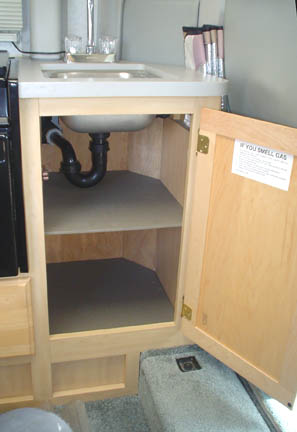
If you also look at the cabinet under the sink you'll note
that it is not well designed in that it allows for only the one shelf thereby
wasting a lot of space due to its excessive height. I realize that the sink and
drain pipe are there but it still seems like a second shelf could be added. And
if you start to take things apart, you'll find that the cabinet itself does not
extend back very far but it seems like several more inches could easily be gained
without interfering with the wiring harnesses behind the cabinet wall.
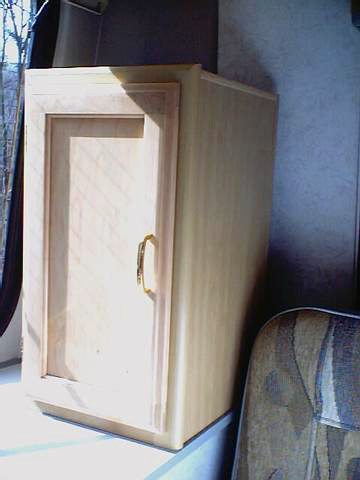
A couple of precautions about this modification. You are dealing
with "finished" surfaces so any sloppy work will show up in the final product.
These wood paneled cabinet doors are all "washed maple" from Winnebago. My modification
did not change the door at all so I simply removed it temporarily to get it out
of the way and protect it from damage. The interior walls of the cabinet are a
similar finished paneling from Winnebago. I could not really change the panel
on the right side (behind the driver's seat) as it was exposed so I left that
panel alone. I replaced the panel on the left side adjacent to the oven and the
rear panel with 1/4" oak finish panel available from Home Depot and just about
any other lumberyard. The rear panel was actually pushed back several inches making
it narrower where it met the 45 degree transition wall. This necessitated another
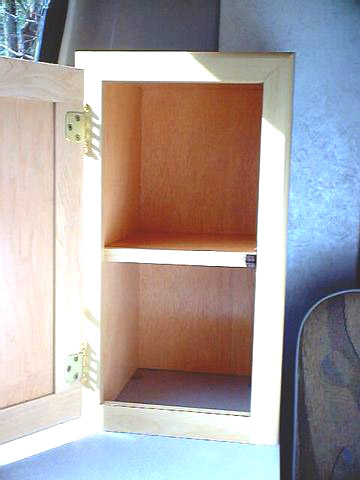
narrow panel of about 4 inches wide. If you look closely at the bottom shelf arrangement
in the original framing picture below you can see that the floor was rectangular.
Now look at the floor in the finished mod of the large picture above and you can
tell that the floor extends back farther and has a small 45 degree corner at the
right side. The color and grain match is not perfect but unless you know its been
changed, you'd never spot the difference.
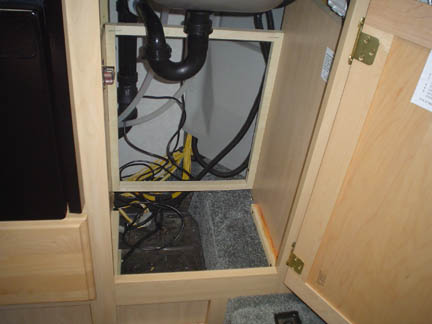 The
wood panels on the back and left were removed, some additional 1" x 1" wood blocking
strips added for structural integrity, and the new panels cut to fit in place.
Instead of a staple gun similar to the one Winnebago used to attach the panels,
I opted to use small #6 countersunk wood screws. Trying to use brads or small
nails would knock apart the frail 1" x 1" wood supports so using the screws seemed
like the sensible way to go.
The
wood panels on the back and left were removed, some additional 1" x 1" wood blocking
strips added for structural integrity, and the new panels cut to fit in place.
Instead of a staple gun similar to the one Winnebago used to attach the panels,
I opted to use small #6 countersunk wood screws. Trying to use brads or small
nails would knock apart the frail 1" x 1" wood supports so using the screws seemed
like the sensible way to go.
The new bottom floor shelf and the new second shelf are 1/4" masonite. You
may wish to consider another wood choice but I wanted to keep things simple, light-weight,
and inexpensive. There are small 1/2" x 1/2" wood supports that run around under
the additional shelf. It is at this location that the additional 1" x 1" wood
supports were needed for the structural integrity. The bottom floor shelf area
still has enough height to get in the tallest box of breakfast cereal that I could
find.
One final touch can be added: its the "secret storage hide-away" that can be
made by simply making the bottom floor shelf removable to expose the wide open
area down to the floor. You can choose to leave this area alone or dress it up
a little with more wood panels to box it in. Once the bottom floor is cut to fit
into the entire cabinet area, you can add a small recessed hardware pull or drill
a hole to act as a finger-pull in order to gain access to this secret storage.

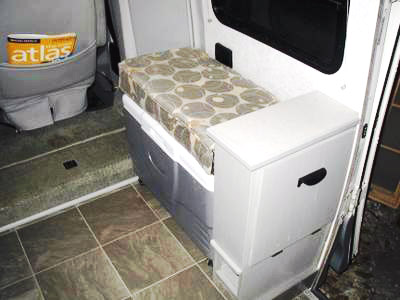
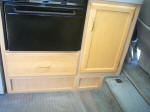
NOTE - Here is another example of the same cabinet only modified to a
greater degree. Notice that the small space underneath the cabinet has been converted
to a drawer.
[ return to top ]