|
[
HOME
]
|
|
Model Information
|
|
|
|
VW Service
|
|
|
|
Winnebago Service
|
|
|
|
Tours & Pictures
|
|
|
|
►
Related
Links
|
| |
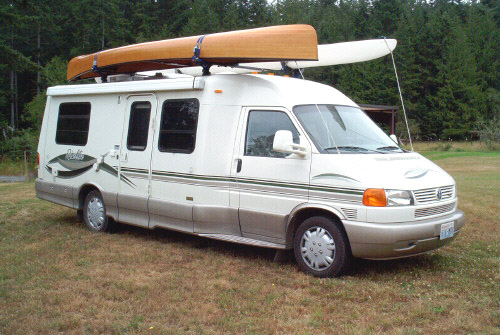
Rialta-Tech Message # 4332
posted 7/28/2002
Subject: Roof Rack System Installed
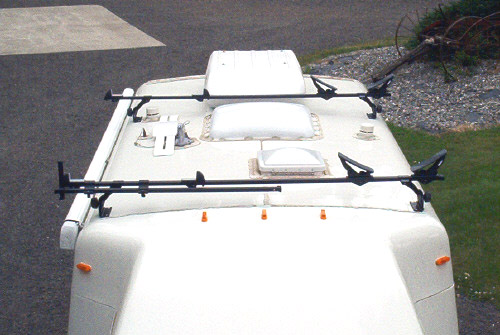
Today I installed a Thule roof rack system on our 2002 QD.
For the most part, the photos and related descriptions
tell the story. Additionally, I will add a few comments here for general information.
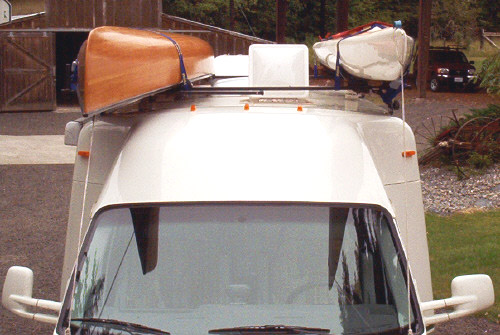
The canoe shown in Photo 12 was easily loaded
by me alone (I'm 5'9") using only a 23" step stool. As described in the notes
for Photo 14, the use of a Thule "Outrigger" makes this task pretty smooth. The
kayak can be loaded directly onto its saddles using the step stool.
It is my intention to normally only carry one
boat on the passenger side with a Thule cargo box on the driver's side. To allow
easy access to the roof, I have designed a ladder that will be permanently mounted
on the rear cap, offset toward the driver's side. As of this writing, I have not
procured the necessary metal tubing I intend to use in welding a custom ladder,
so I will post a separate message and series of photos outlining this task.
Happy traveling...and now boating too!!
Bruce
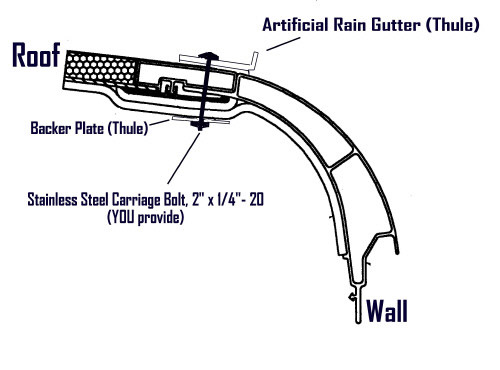
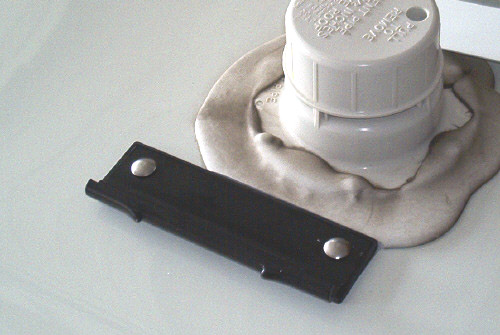
Thule Parts:
Qty= 1, Part= 300, Item= Gutter Foot Pack
Qty= 1, Part= 542, Item= Artificial Rain Gutter
Qty= 1, Part= LB78, Item= two 78" Load Bars
Qty= 2, Part= 876, Item= H2GO Saddles
Qty= 1, Part= 579, Item= Canoe Carrier
Qty= 1, Part= 547, Item= Outrigger (load assist)
Qty= 1, Part= 544, Item= 4 Lock Cylinders
Misc. Parts:
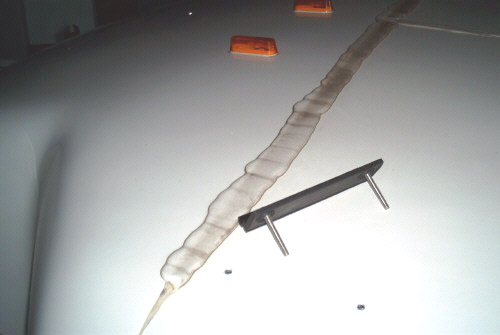
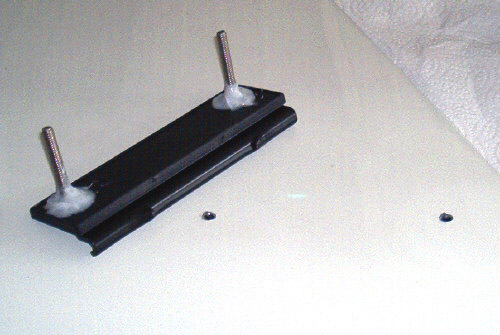
Qty= 8, 1/4" x 2" Stainless Steel Carriage Bolts
Qty= 8, 1/4" washers
Qty= 8, 1/4" nuts (with nylon locks)
Small quantity of silicone caulking
General Notes:
-
The misc. bolts, washers and nuts are required
because the ones supplied with the Artificial Rain Gutter are only 1 1/4" long,
we require 2" in length for this application.
-
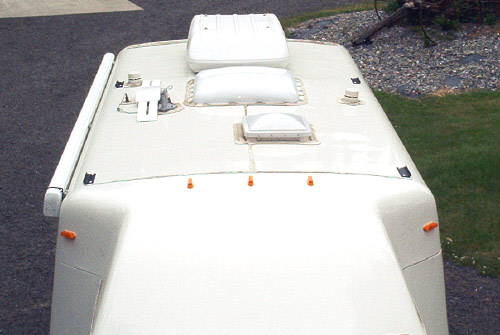
Plan your layout carefully so load bars do
not obstruct other items on the roof.
-
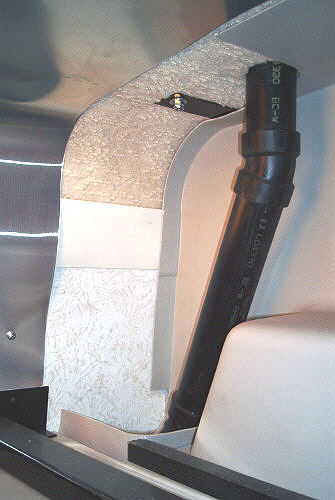
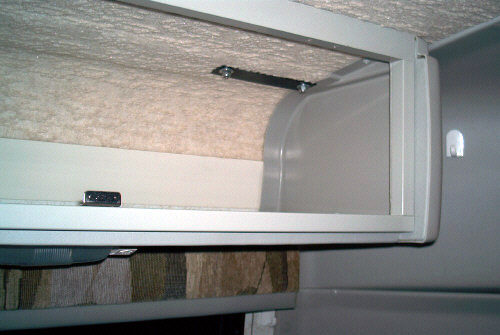
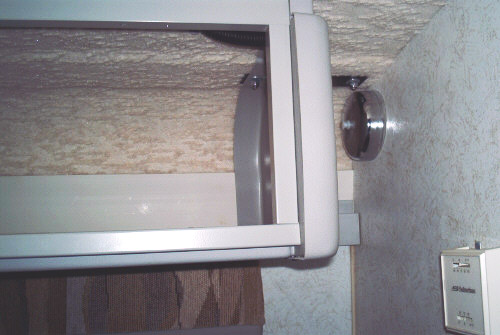
Know exactly where your bolts will project
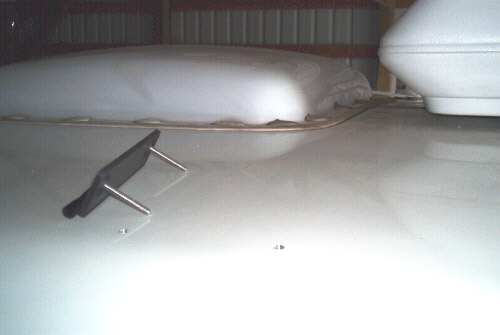
into the interior ceiling, so you have access to fasten backer plate and nuts.
Additional Modifications:
|