|
[
HOME
]
|
|
Model Information
|
|
|
|
VW Service
|
|
|
|
Winnebago Service
|
|
|
|
Tours & Pictures
|
|
|
|
►
Related
Links
|
| |
On This Page:
The Reason for a Fuel Shut Off Valve
The fuel for the generator comes out of a separate dip tube in the Rialta gas
tank. It is pumped by a separate 12 VDC low head fuel pump located near the back
of the generator on the right hand lower side then through a fuel filter and into
the carburetor. When you push the start switch for the generator you activate
the fuel pump and it keeps running as long as the generator does. The standard
way to stop the generator is to short out the ignition through the kill switch
on the panel. This leaves the carburetor full of fuel which is subject to evaporation
and thusly the formation of varnish in the carburetor.
A better way to stop the generator would be to cut off the fuel
supply and let the carburetor empty out thus preventing the root cause of varnish.
We think this solution has a lot of merit and certainly an easier solution than
the recommended constant “exercising” put forth by Onan. Varnish can’t form in
an empty carburetor!!!
The easy method to cut off the fuel supply to the carburetor is to install
a shut off valve. The installation and proper use of a manual fuel shut off valve
in your generator fuel line prevents the formation of “varnish” in your generator
carburetor and “varnish”, which is not covered under warranty, is the single biggest
cause of generator failure.
The way this works is as follows: If you know that you are not going to be
using your generator for the next few days or few weeks, close the manual fuel
valve while the generator is still running. The carburetor will empty out and
the motor stop. Present day gasoline being what it is, it will help your Rialta
and your generator if occasionally you put a can/bottle of injector/carburetor
cleaner in the Rialta fuel tank.
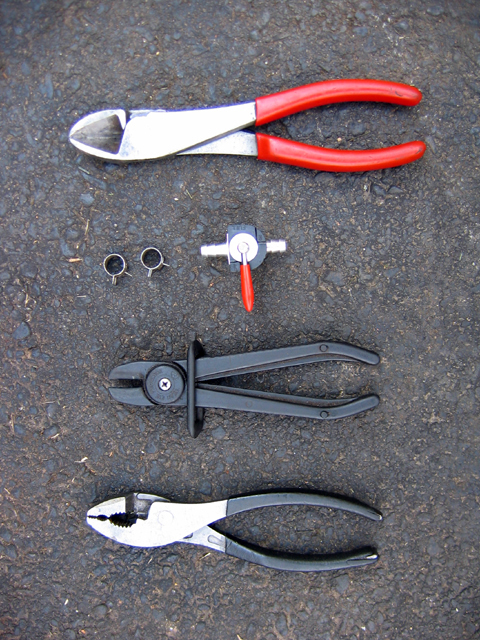
You will need the following parts, all available from NAPA for less than $15
total.
about 18” of 5/16” fuel line.
one in-line 5/16” fuel valve w/ barbed ends.
five hose clamps
Proceed as follows:
- Remove the short piece of hose connecting the fuel filter to the carburetor
- Cut the 18” fuel line into appropriate lengths and splice the in-line valve
into the system between the fuel filter and the carburetor.
- Fasten the system to keep it from flopping around such as the plastic wire
ties,
For those who are a bit timid about doing it themselves, most any RV Dealer
will do it for fifty bucks.
[ return to top ]
ONAN Generator - Installing a Fuel Shut Off Valve
NOTE - The following mod was originally submitted to the
Tech
Rally group by
RayWilkes August 2004 updated December 2005
This simple modification prevents the build up of varnish and gum in the generator
carburetor, which may occur when the generator is not used for more than a month.
A metal valve is placed in the fuel line for the generator, in order to shut off
the fuel supply, so the generator maybe run until the fuel is exhausted. PDF (29KB)
APPROX. MODIFICATION TIME:.5hours
PART LIST:
All prices are approximate, pre-tax, and pre-shipping.
NOTE: These parts work for both the Generac and Onan generators.
| [1] One foot of 1/4" fuel line hose. It MUST be for fuel lines. |
$1 |
| [2] Two hose clamps for the above hose. |
$2 |
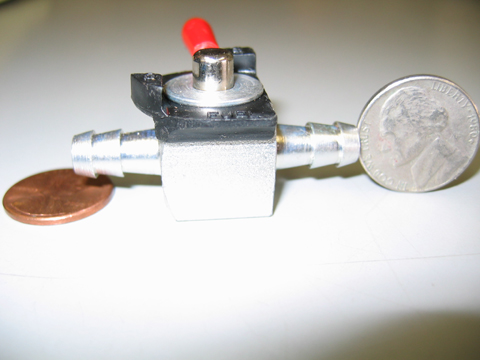
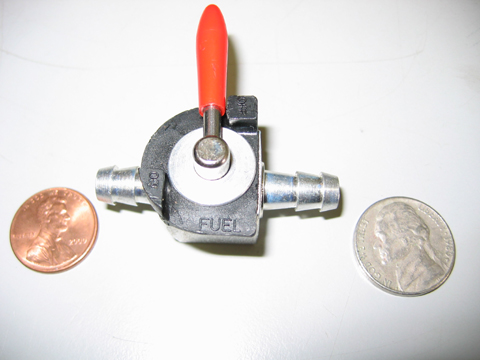
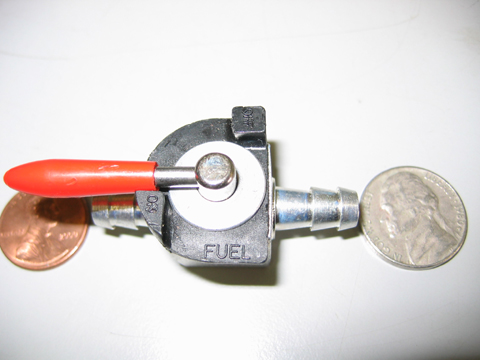
| [3] One straight fuel shutoff valve with1/4" nipples "Mfg Supply part
#20-868" at Mfg supply.com |
$11 |
| [4] some cable ties |
$1 |
| APPROX. TOTAL COST OF PARTS |
~$15 |
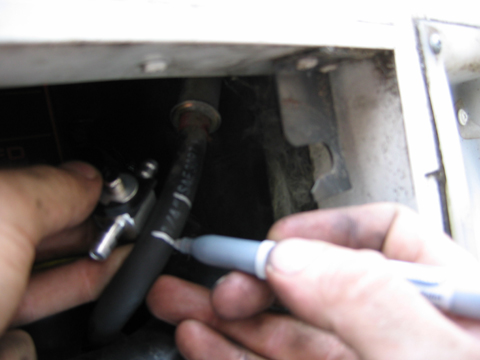
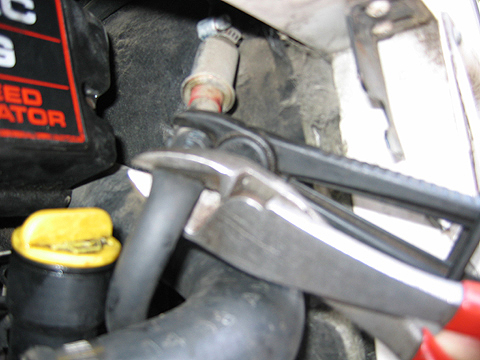
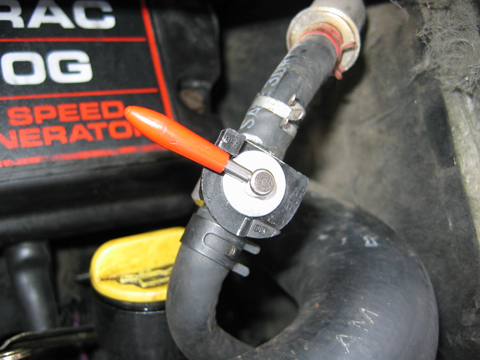
Remove the existing fuel line hose from the input to the carburetor [upper
part of photo].
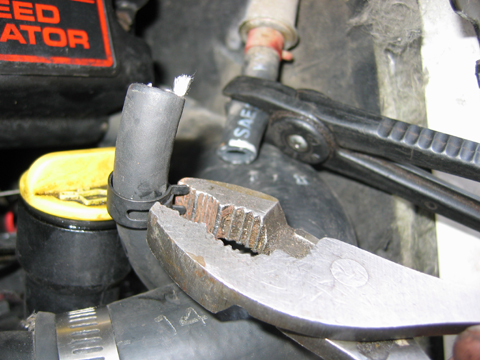
Route original fuel line and fuel filter as shown, behind oil filler tube,
and secure with a tie strap as shown.
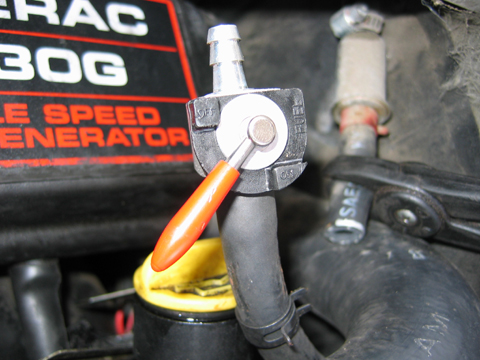
Insert the assembly of the shut off valve and its two fittings.
With hose clamps in place, put the12"piece of fuel line on to the carburetor
and the other end of the valve assembly. When installing the hose clamps, be
sure they are turned so that when tightened, they will not interfere with the
operation of the shutoff valve.
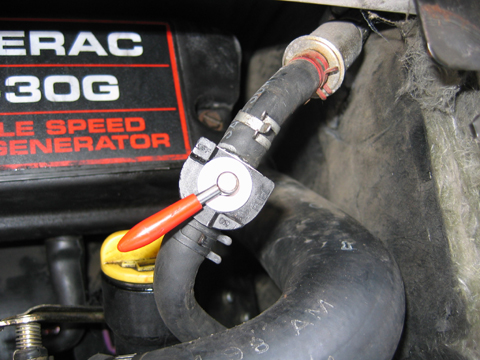
Tighten the hose clamps, and you are ready to try it.
Be certain that there are no leaks!! I always have a fire extinguisher handy
when working on things that can burn!
Turn the fuel valve to on, start the generator and run it for a while to
further check for fuel leaks.
Turn the shutoff valve to the off position [Crosswise the shut off valve]
and let the engine run until it protests and finally stops. [Around 2 minutes]
Run at least another cycle to be sure it all works O.K.
The generator should have the shut off valve closed and allowed to run until
it quits when the generator will not be used for any extended period, such as
two or three weeks. The next time it is started, allow a few seconds of extra
cranking, for the fuel pump to operate and fill the carburetor fuel bowl far
enough for the generator engine to have fuel available and to start running.
[ return to top ]
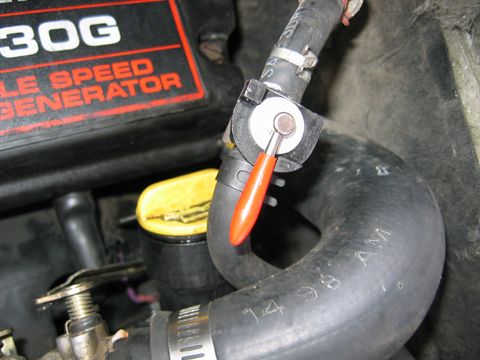
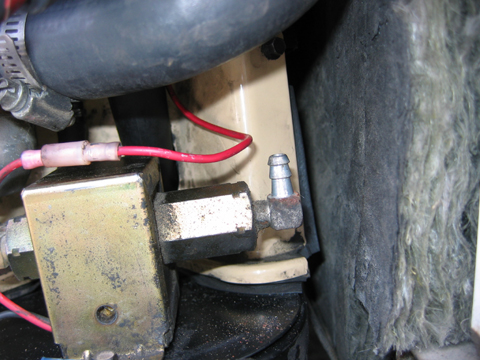
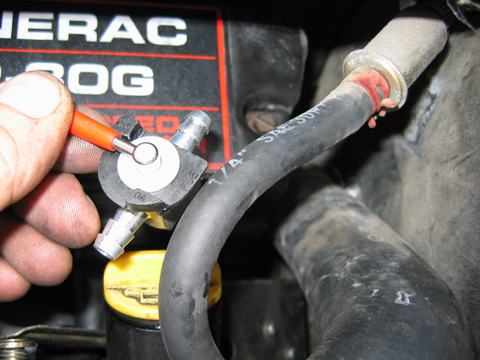
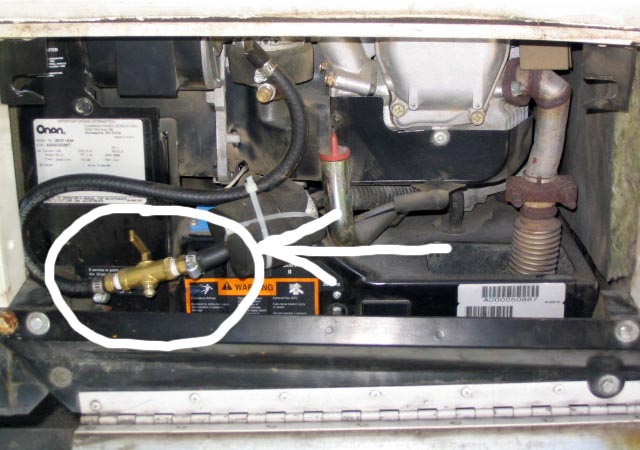
GENERAC Generator - Installing a Fuel Shut Off Valve
NOTE - The following mod was originally submitted to the
Tech
Rally group by Holly
Towne in August 2004. Additional photos added from her similar posting
at http://www.myhome.org/rialta99QD/Generac.htm.
This simple modification prevents the build up of varnish and gum in the generator
carburetor, which may occur when the generator is not used for more than a month.
A metal valve is placed in the fuel line for the generator, in order to shut off
the fuel supply, so the generator may be run until the fuel is exhausted. PDF (62KB)
APPROX. MODIFICATION TIME: < .5 hourPART LIST:
All prices are pre tax.
|
In-Line Fuel Shut Off Valve |
$10 |
| Two clamps |
<$2 |
| APPROX. TOTAL COST
OF PARTS |
≈ $12 |
TOOLS & PARTS:
INSTRUCTIONS:
[ return to top ]
Additional Modifications:
|