|
[
HOME
]
|
|
Model Information
|
|
|
|
VW Service
|
|
|
|
Winnebago Service
|
|
|
|
Tours & Pictures
|
|
|
|
►
Related
Links
|
| |
This modification originally appeared on the "Tech Rally" group on Yahoo and
was submitted by Gene Caldwell in September 2004. PDF (148KB)
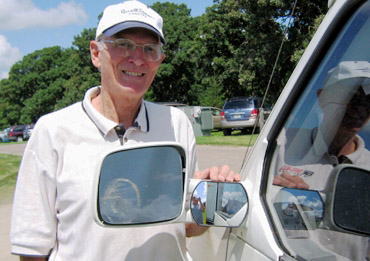
Convex Driver’s Side Mirror
Eliminate that infamous side-rear “blind spot” by adding a 4” x 5” convex mirror
to the VW driver’s side mirror. A mirror can be installed on the passenger side
too, but due to the angle of the VW mirror arm it doesn’t help the driver very
much, although it does help the passenger check the passenger side blind spot.
APPROX. MODIFICATION TIME 1 hour
PART LIST
All prices are pre tax.
| The mirror you choose should be 4" x 5" or 4.5" x 5”. As
you can see in the pictures, the mirror I chose is the same height as the
VW mounting arms and fits perfectly between the VW mirror and the door.
|
≈ $5 |
| Plastic, 1/8” and 1/4“thickness |
< $1 |
| Stainless steel counter sunk screws, 2; 6-32x1/2” and 2;
6-32x3/4” |
< $1 |
| Lock tight, one drop per screw. |
< $1 |
| Oil or bar soap for tap lubrication |
< $1 |
| APPROX. TOTAL COST OF PARTS |
≈ $10 |
TOOLS NEEDED:
• Tools needed for screw mounting procedure
- Marker pencil, pencil works better that ball point pen
- Center punch, a spring punch works very well
- Electric drill, preferably a cordless
- Drill bit, either a 7/64” or #36 will match the 6-32 tap
- 6-32 Taper tap
- Tap wrench or method for holding and turning tap to cut
threads
- Oil or bar soap to lubricate tap
- Screw driver to match mounting screws, Phillips works very
good
- Double sided tape
- Lock tight for mounting screws
• Additional/Different tools needed for pop-rivet installation:
- Pop-rivet gun
- 2, 1/8”x1/2” aluminum pop-rivets
INSTRUCTIONS:
Note #1: There is a down side to mounting a mirror this way. Most VW mirrors
are held in place with a strong spring. As it is now, if you ever make hard contact
with something pushing the mirror out of its mount, it will move and safely spring
back. This is a safety feature and each owner should be aware of this before this
type of mirror installation is considered.
NOTE #2: On my first mirror installation, I used the mirrors supplied sticky
tape to mount it to the VW mirror arms. This method was easy and quick except
when we met the first big truck on a windy day it blew off. Luckily it didn’t
hit the car behind me. So I came up with a white plastic mounting plate to be
permanently secured to the VW arms. This mounting plate does three jobs; first,
it absorbs the windblast, second, it gives the mirror’s sticky tape something
flat to stick to as it was meant to have, and third, it tilts the mirror to the
proper viewing angle. Mine has been through down pours and all the wind I ever
wish to drive through.
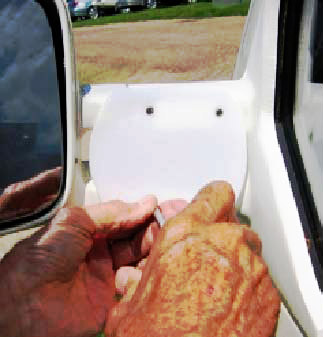
|
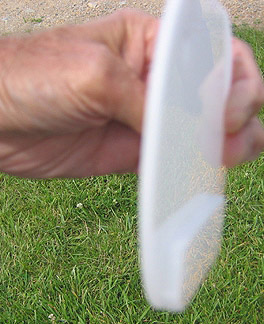
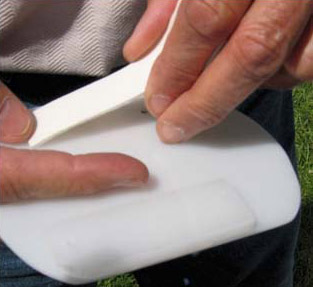
Pre-installation
plastic mounting plate preparation: Cut 1/8” thick plastic to match the perimeter
of the mirror, mark and drill 4 holes and counter sink each hole. Each hole
location is determined by where each hole is located on each arm. Cut, drill
and glue 1”x3”x1/4” plastic spacer on bottom of mounting plate. This helps
tilt the mirror up for better field of view.
|
 |
|
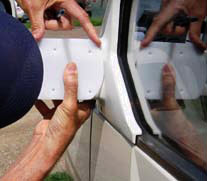
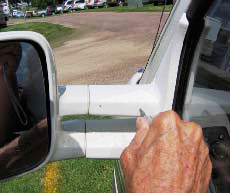
Position
plastic mounting plate on VW arm.
|
 |
|
With a pencil
mark arms in preparation to drill 4 holes.
|
 |
|
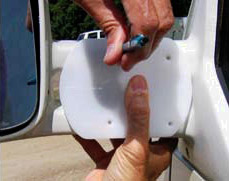
Use center
punch to dimple arms for correct drill location.
|
 |
|
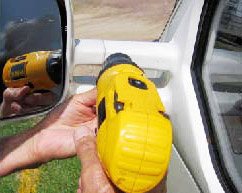
Drill 4
holes in VW mirror mounting arms, 2 top, and 2 bottom.
Use !!!EXTREME
CAUTION!!!, when drilling the holes in the VW arms! The wires for your electric
mirrors are located inside the hollow VW mounting arm. When drilling the holes,
be very careful to not let the drill penetrate far inside the arm. It could
cut or damage a wire and then the mirrors might not work.
|
 |
|
After four
holes have been drilled in the VW mirror arms the plastic can be mounted using
one of two methods, pop-rivets or screws. The quickest installation method
is to use pop-rivets, especially if you already have a pop-rivet gun, the
correct size and length of rivets, and correct size of drill bit to match
the pop-rivets. However, the only way to remove pop-rivets is to drill them
out. They do not unscrew. If you damage a hole while drilling out a pop-rivet,
then you may have to make the hole bigger, make the hole in the plastic bigger,
get bigger pop-rivets and then remount the plastic. With all that in mind,
this is the reason I use screws to mount my plastic mounting plate. It takes
more time on initial installation but is very quick and easy to repair. If
breakage occurs, just remove the screws, remount a new plastic plate, stick
on a new mirror and your done. So the choice is yours, time and effort spent
now on installation or later for repair.
|
|
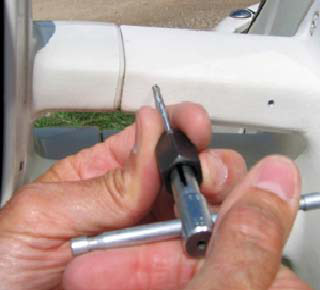
Lubricate
tap and cut threads.
|
 |
|
Then, install
double-sided tape on the side of the plastic that is mounted to the arm, one
across the top and one across the bottom between holes. This is not needed
for holding the plate to the arm, but for taking up slack between curved arm
and flat plate.
Remove protective
paper to expose other side of doubled sided tape.
|
 |
|
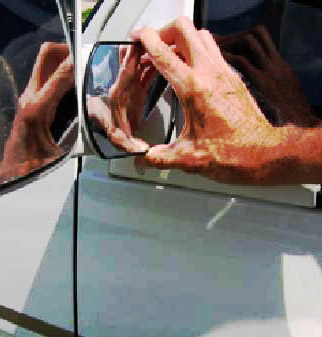
Screw plate
to arms. I used a drop of lock tight on each screw to ensure that they don’t
back out from vibration. Remove protective paper from mirrors double-sided
tape and stick mirror on plate.
|
 |
|
You are
done, job complete. It might take about 10 to 15 minutes of city/town driving
to get used to this new mirror but after that you will not be without it,
believe me.
|
 |
Additional Modifications:
|
