Rear Seat Kick Panels

 [ HOME ]

Model Information

Miscellaneous
Accessories
Floor Plans & Specs
How To Buy Or Sell A Rialta
Known Problem Areas
Modifications, VW & Coach
New to RVing? Info here
Pros & Cons of a Rialta
Vehicle Checklist
VIN Information
Winter RV Storage

VW Service

Air Conditioner
Brakes
Door & Locks
Engine Battery
Engine Repair Information
Filters
Fuses: Dash & Engine
Mechanics & Dealers List
NHTSA Recall Notices
Oil Change
Parts Diagrams
Radiator & Coolant
Serpentine Belt
Service & Tech Bulletins
Spark Plugs & Ignition Wires
Transmission Service

Winnebago Service

Appliance Recalls
Bulbs
Caulking and Sealants
Coach Batteries
Electrical Breakers & Fuses
Furnace & Thermostat
Generator
Microwave, Range & Oven
NHTSA Recall Notices
Paint Codes
Parts Catalog
Plumbing Diagrams
Refrigerator
Service Bulletins
Shocks and Air Springs
Shower
Supplier Links
Tires & Wheels
Toilet
Water Heater
Water Pumps & Filters
Winnebago Corporate Info
Wiring Diagrams

Tours & Pictures

Public RV Sanitary Dumps
Strange & Unusual Places
Winnebago Factory Tour

   ► Related Links


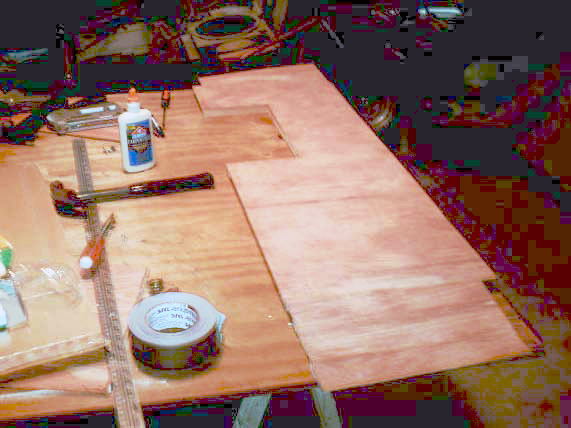
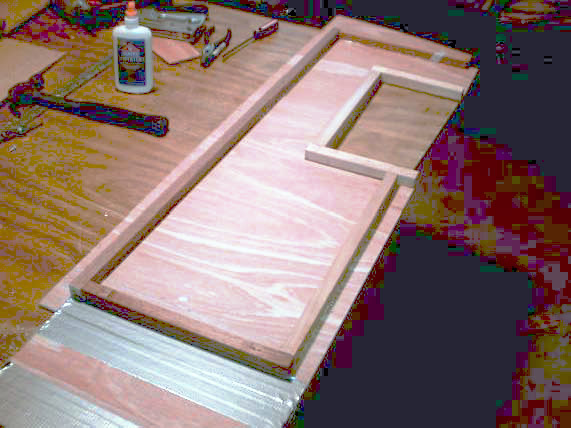
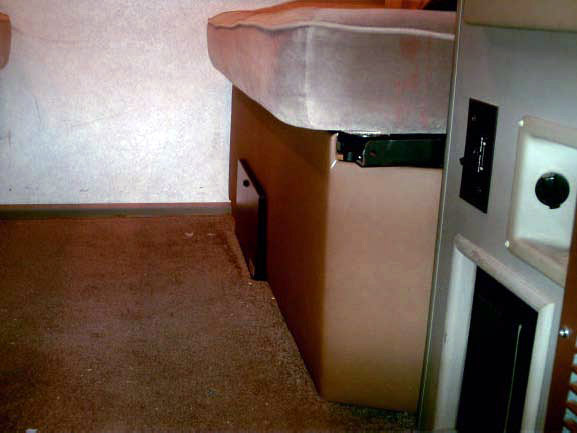
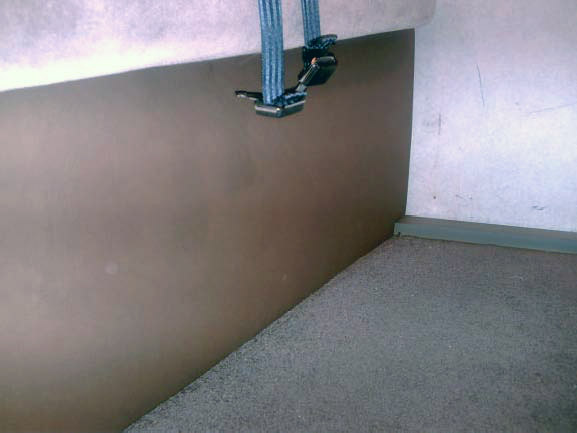
The HD and QD models with the rear dinette seats have a "kick panel" below the seating surface.  These panels must be removed in order to access any of the plumbing or wiring hidden under the seats.  The original panels as supplied by Winnebago are nothing more than stiff cardboard covered with vinyl and use 1" x 1" wood to form a skeletal frame.  They are held in place by metal clips (Grip Clip Mod PDF, 89KB) and strips of Velcro with the screws around the fuse/breaker box on the driver side assisting in holding that one in place.  The Velcro frequently lets go of either the metal tube frame of the seat or the kick panel itself.  If you look closely at the vinyl where it forms around the corners and bends of the kick panel, it is clear that a neater arrangement could have been used.

This modification was originally posted as part of "This Old Rialta" in the Photos section of the Rialta-Tech group on Yahoo.

The kick panels under the rear dinette were stained and badly worn.  These panels are made from cardboard and covered with fabric to match the seats.  I have made new ones from 1/8 inch plywood and covered them with vinyl that matches the carpet (a dark Brown).

The duck tape forms a hinge for the left side panel.  The plywood is much stiffer than the cardboard so it stays in place without the metal clips it just wedges behind the power panel and the seat frame NO MORE SCREWS!  The other side is held in place with a piece of Velcro at the top center.

Click on any image to view full size


Additional Modifications:

[ Arm Rest Removal ] [ Automatic Transfer Switch ] [ Awning ] [ Bathroom Shelf & Basin ] [ Battery Disconnect ]
[ Belly-Pan Cutout ] [ Bicycle Rack ] [ Cabinet Storage ] [ CB Radios ] [ Center Console ]
[ Closet Shelf ] [ Coach Door Seals ] [ Coach Entry Floor ] [ Computer Table ] [ Convex Door Mirror ]
[ Curtain Track ] [ Door Catch ] [ Daylight Running Lights ] [ DVD Conversion ] [ Entertainment Center ]
[ Entry Handrail ] [ Exterior Power Inlet ] [ Exterior Shower Drain ] [ Fuel Pump Jumpers ] [ Furnace Vent ]
[ Galley Faucet ] [ Generator Fuel Cutoff ] [ Granite Countertop ] [ Headboard ] [ Jack Handle Storage ]
[ LCD TV Conversion ] [ LED Bulbs ] [ Magnum Shooters ] [ Map Box ] [ Microwave Convection Oven ]
[ Propane Detector ] [ QD-H Conversion ] [ Rear Axle Stiffener ] [ Rear Couch Foam Roll ] [ Heat Control Label ]
[ Rear Seat Kick Panels ] [ Refrigerator DC Mode ] [ Refrigerator Conversion ] [ Roof Air 13,500 ] [ Roof Rack ]
[ Satellite Dish ] [ Sewer Dump Valve ] [ Sewer Hose Storage ] [ Shade Standoffs ] [ Shower Faucets ]
[ Shower Filter ] [ Simple Shoreline Conversion ] [ Skylight Panel ] [ Spare Tire Carrier ] [ Super Freezer ]
[ Throttle Body Cleaning ] [ Transmission Dip Stick ] [ Trunk Handle ] [ Wheel Covers ]  

[ HOME ]
No images, artwork, or photographs may be used without  permission.
Page Updated: 21 May 2015